I’ve always found seed saving to be a very romantic idea. One invoking dusty jars half way full of satiny seeds of different shades and sizes - maybe even of a grandmother passing one of those jars to her grand daughter as she departs for life in a distant country... sigh! The beauty behind the sustainability, resourcefulness, and independence in seed saving is just as compelling to me. There are many reasons why you might want to start seed saving. Saving seeds encourages the continuation of ecological diversification by keeping heritage and rare breeds from being wiped out. Saving and replanting seed is to engage in the cycle of life and the idea that doing so can now be seen as a controversial activity is more than just a little unnerving. It’s a very interesting topic worth learning about and I’d like to share a video from one of my favorite seed saving champions, Vandana Shiva with you for a good intro...
I’ve been wanting to give seed saving a try ever since I first heard about the concept, embarssingly, only a year or so ago! My excuse for not having gotten to it yet is that, strangely, the herbs that Scrapple and I planted over a year ago in our makeshift indoor window box “garden” still haven’t gone to seed! There have been times when our basil (which looks like a topiary - it’s hilarious) hasn’t been harvested for weeks and it still doesn’t flower! Somehow they have become more like pets than plants and I’ll be sad if I lose one to anything other than a natural grand finale.
Last week my lavender finally started to go to seed! Excited for my first seed saving experience, I set out to find the correct technique to use. I found some great instructions and information from these resources:
The Seed Ambassadors Project (Via The Greenhorns)
Int. Seed Saving Institute
Primal Seeds
and more lavender focused info from Mountain Valley Growers
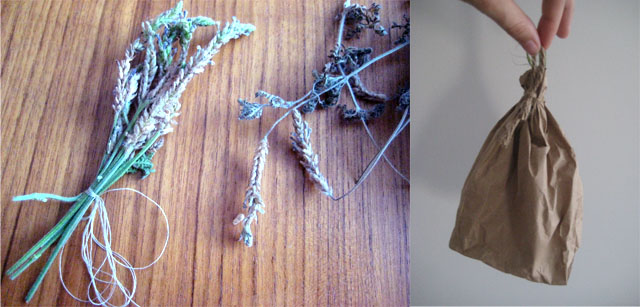
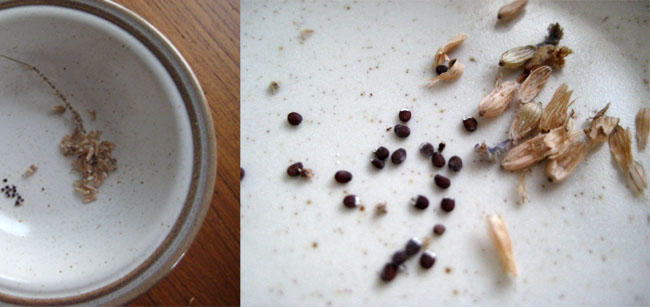
First I cut the flowers above the woodier/brown part of the stem, trying to select hardy looking flowers that had bloomed all the way up the bud. I collected a handful and tied them together into a tiny bouquet and then closed them hanging upside down in a paper sandwich bag. I left them to dry for several days in my closet (cool and dry) and when they were ready, removed the flowers from the stem, rubbing them between my fingers until the seeds popped out. The seeds are tiny but they’re in there! I discarded the stems, but you keep the flowers if you’d like (try sprinkling some on a honey drizzle over pecorino).
 lavender bouquet and paper bag drying
I stored them in a glass jar and will keep them in a dry dark place away from excessive heat. Lavender seeds have a short shelf life so I will need to plant them within a year.
Before you go through this whole process, identify your lavender and make sure the variety you have can be started from seed. While learning how to harvest the seed I learned that some varieties (the most popular Lavenders, the Lavandula x intermedias; sometimes called Lavandins, either do not make seeds or have sterile seeds.
It was very simple, easy and fun - I can't wait to plant them! Since that first experience last week I've been on the look-out for more seed saving opportunities. I harvested columbine (Scrapple's favorite flower) seeds from my mother's flowers at home in VT in between wedding projects last Friday and came home to Brooklyn to find that our cilantro had started to flower! It will be tough to save the seeds to plant and not eat them - coriander (cilantro seed) is one of my favorite spices. Yesterday afternoon I helped it pollinate by giving it a little shake and wiggle. Soon it will form tiny seeds at the inside of the flower which will grow and ripen over the course of the next 2 to 3 weeks which I will then harvest by cutting and drying. I’ll give an update and how-to after it all comes to fruition (ha).

I'd love to hear about your experiences with seed saving! Next I'll be trying tomatoes using the wet method and would love any tips you might have.

